With Microsoft expanding their suite of apps every month, it can be difficult to create the right view of data for you to personally consume without context switching. Recently I have been exploring the Office365Outlook Connector in Canvas Apps to bring a day view of my calendar into a Power App alongside information from other meeting & task related content that I consume on a regular basis, and here are a few tips on how I created the solution.
Collect the data.
Now, I’m breaking all of the rules here. This is not low-code and it requires a relatively complex collection in order to gather the correct data, and time zones can be a pain too. Let’s break it down into the Power Fx formula that we’re going to focus on:
- ClearCollect: We need to create a new collection for our data and treat Office365Outlook.GetEventsCalendarViewV3 as the source for everything that we need.
- Office365Outlook.GetEventsCalendarViewV3: Given that the Office365Outlook.GetEventsCalendarViewV3 data requires a start and end, we need to define our duration of appointments. Now in my tenant unfortunately my time zone is offset by one hour compared to the data stored against the calendar entry, but I really want to avoid any appointments for the next day so I’m going to need to bear this in mind when creating my filter by adding 22.5 hours. I am deliberately leaving this in my solution, because I am sure that there are alternatives to resolving this issue, but this is the reality with working within constraints that you don’t have full control over.
- SortByColumns: We will also want to sort our data in ascending order to ensure that we see the correct flow of information.
- ShowColumns: Finally, we want to limit the data initially retrieved too, as this data set can be quite large and include columns that you are very unlikely to use. More information on this can be read in my previous post here: Reduce Columns Created in a Collection in Canvas Apps
In order to achieve all of the above in these particular circumstances, we need to write the following Power Fx code in the OnStart property of the App.
ClearCollect(
    MyMeetings,
    SortByColumns(
        ShowColumns(
            Office365Outlook.GetEventsCalendarViewV3(
                "Enter Your Calendar's ID here.",
                Text(
                    DateTimeValue(Today()),
                    DateTimeFormat.LongDateTime
                ),
                Text(
                    DateTimeValue(
                        DateAdd(
                            Today(),
                            1350,
                            TimeUnit.Minutes
                        )
                    ),
                    DateTimeFormat.LongDateTime
                )
            ).value,
            "start",
            "end",
            "showAs",
            "isAllDay",
            "subject"
        ),
        "start",
        SortOrder.Ascending
    )
);
You can then ‘Run OnStart’…
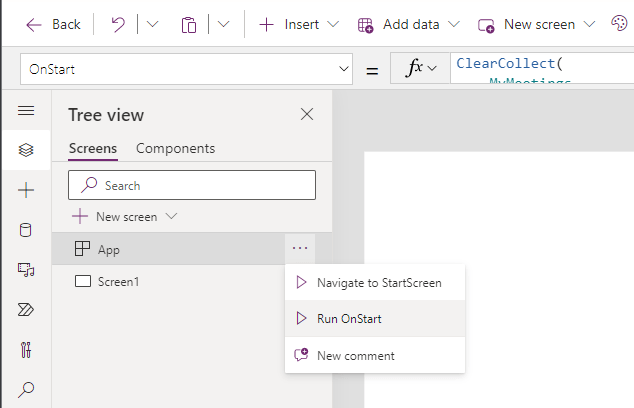
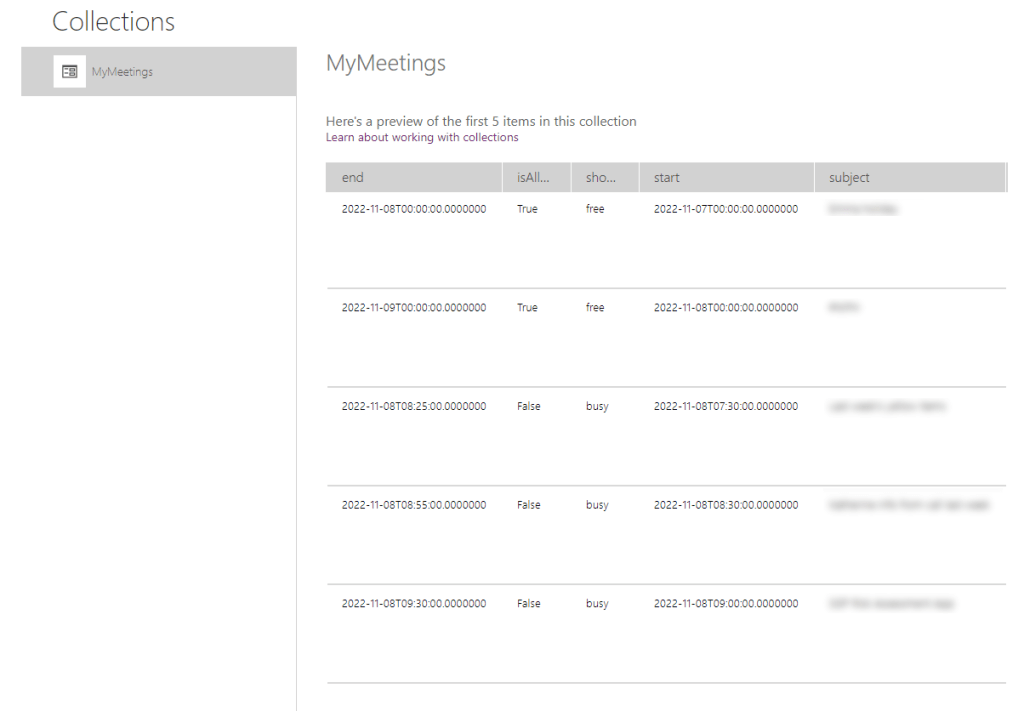
…and then navigate to your Collection to prove that you’re seeing the correct data from the three dots on your command bar.
Display the data on the screen.
Now that we are sure that we are collecting the correct data, we can now move towards adding this information into a gallery.
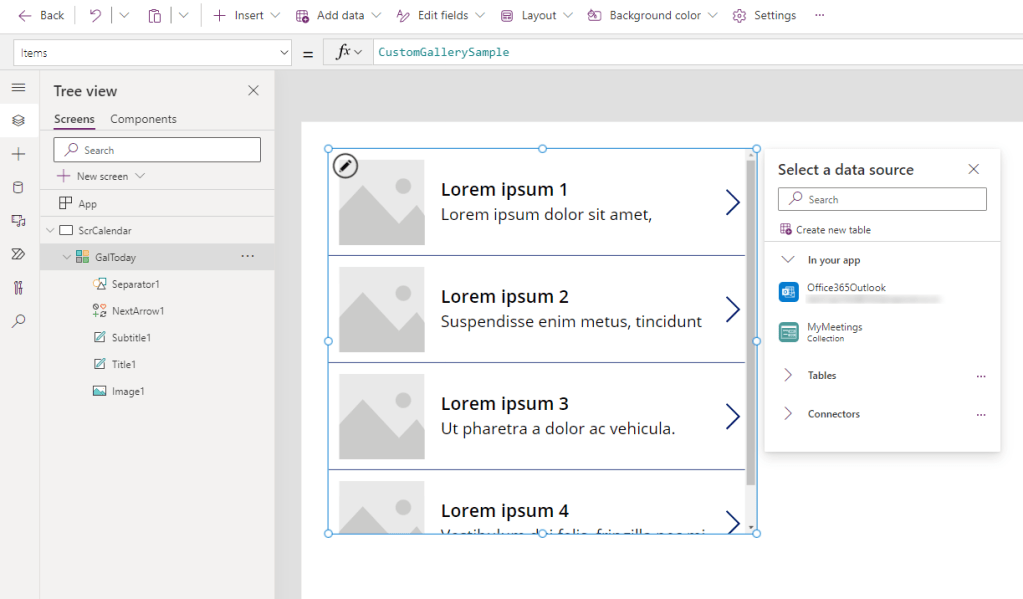
Remember that when you’re choosing your data source, you need to choose the “MyMeetings” Collection and not the Office365Outlook connection. This will ensure that you’re loading all of the filtered data from your OnStart formula.
Visualise!
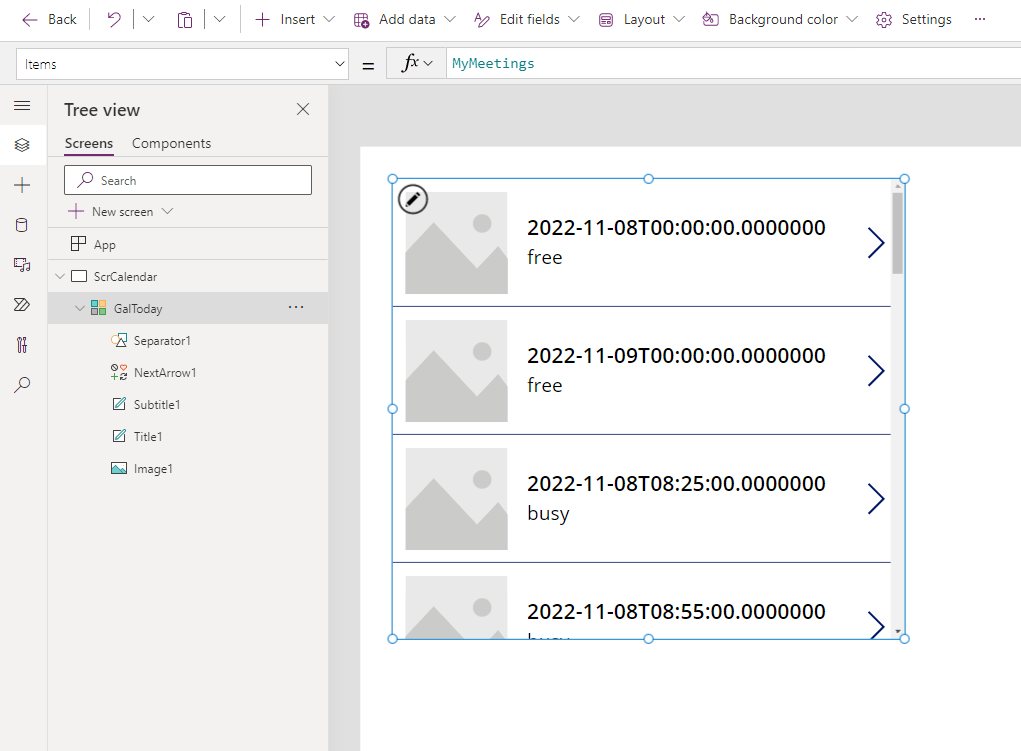
As you can see from the previous image, the attempt at showing our Collection’s data doesn’t exactly provide any benefit or meaning, and it doesn’t look like a calendar at all. Let’s change that with the following requirements:
Show the Outlook image and a count of the items being displayed on today’s calendar.
We’re going to source the Outlook logo and also add a Label control that counts the rows within our Collection by using the following code:
//X meetings today
Concatenate(CountRows(MyMeetings), " meetings today:")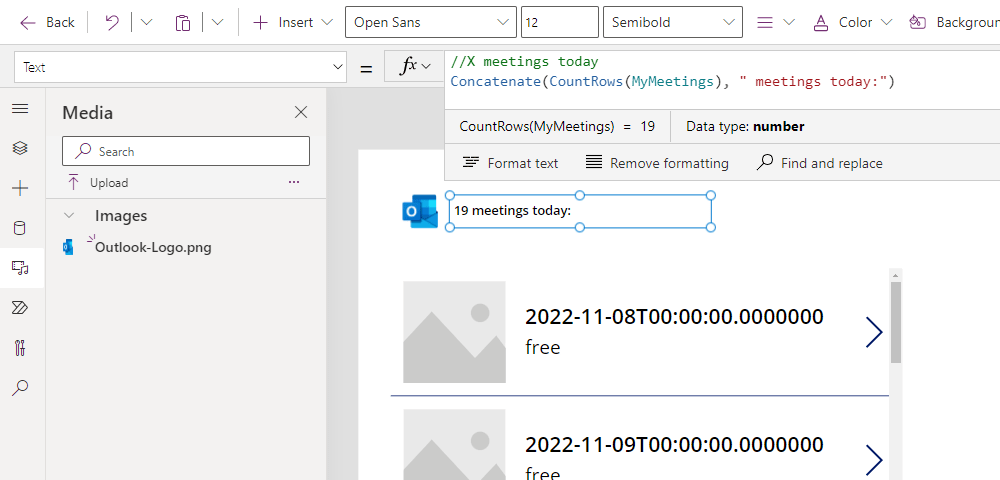
Show the time of the meeting or whether it’s an All Day Event.
Let’s get rid of that placeholder image and make use of the space that we have. To alternate between All Day Events and the time itself if it’s not all day, we need to write some conditional logic in a Label based on our Collection’s data.
First of all we need to understand whether the isAllDay value is set to true. If it is, we simply need to show the words “All Day”, if it’s not, then urgh! We need to visit time zones and time values again. For this particular example I had to carry out some logic to show the times within a format that looked correct based on my tenant’s time zone, the time zone value set against the meeting, and the local time zone of where I was using the app. This results in the following formula which concatenates “start” and “end” if the isAllDay value is false:
If(ThisItem.isAllDay = true, "All Day",Concatenate(Text(TimeValue(DateAdd(DateTimeValue(ThisItem.start),TimeZoneOffset(Now())*-1,Minutes))), " ",Text(TimeValue(DateAdd(DateTimeValue(ThisItem.end),TimeZoneOffset(Now())*-1,Minutes)))))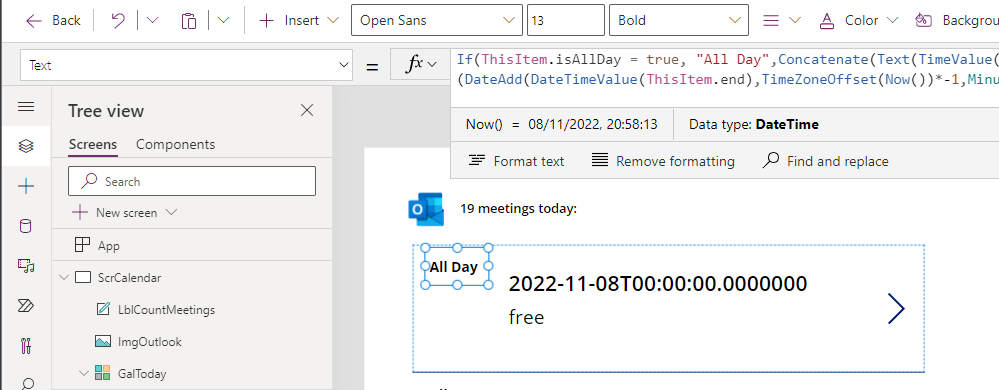
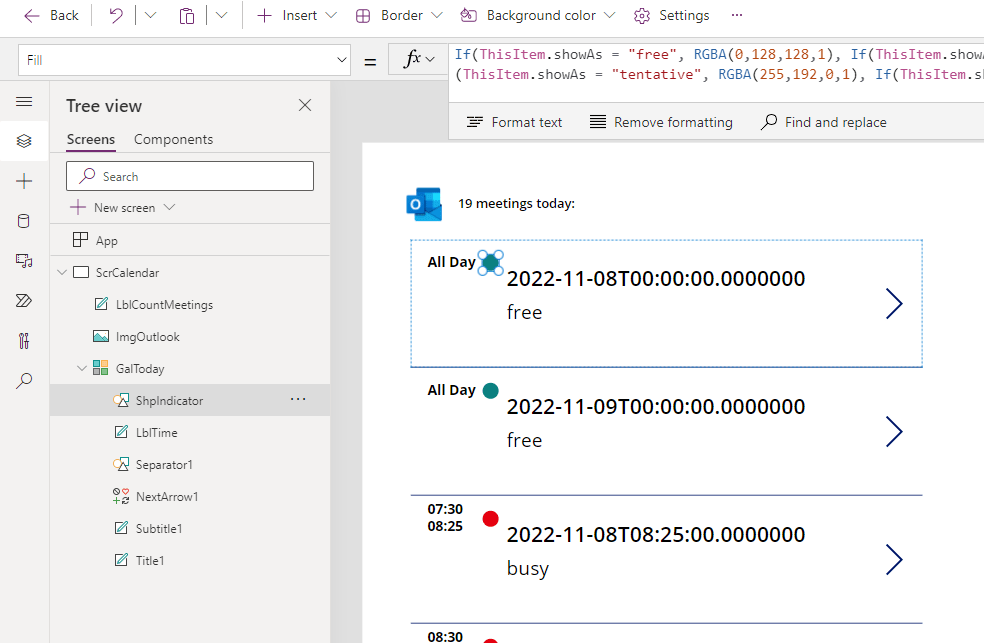
Indicate the meeting’s status.
Now this is my favourite part of the solution. We could show the status using words as shown in the Gallery so far, or why don’t we assign an indicator a specific colour based on the status?! This nested If statement allows us to check for the values within the “status” column and set a colour based upon it. If the “status” is null, then the indicator will be black.
If(ThisItem.showAs = "free", RGBA(0,128,128,1), If(ThisItem.showAs = "busy", RGBA(230,0,0,1), If(ThisItem.showAs = "oof", RGBA(102,51,153,1), If(ThisItem.showAs = "tentative", RGBA(255,192,0,1), If(ThisItem.showAs = "workingElsewhere", Gray, Black)))))
Add the final touches.
From here it’s entirely up to you how you style your calendar view. Personally, I would like to format the main body of the row and add the description, and then make a few changes to the styling of the Gallery. If you want to use any of the other available data from this action, just ensure that you add that specific column in your ShowColumns formula within the ClearCollect statement in your OnStart.
To finalise the solution, I then carried out a series of visual changes with very little code:
- Removed the chevron.
- Removed the original “showAs” label.
- Replaced the “end” label with “description” by changing ‘ThisItem.end’ to ‘ThisItem.subject’.
- Shrunk the height of each row in the gallery.
- Adjusted the alignment of each component.
- Changed the colour of the separator.
- Renamed the controls that hadn’t already been modified earlier.
- Adjusted the size of the logo and count of meetings.
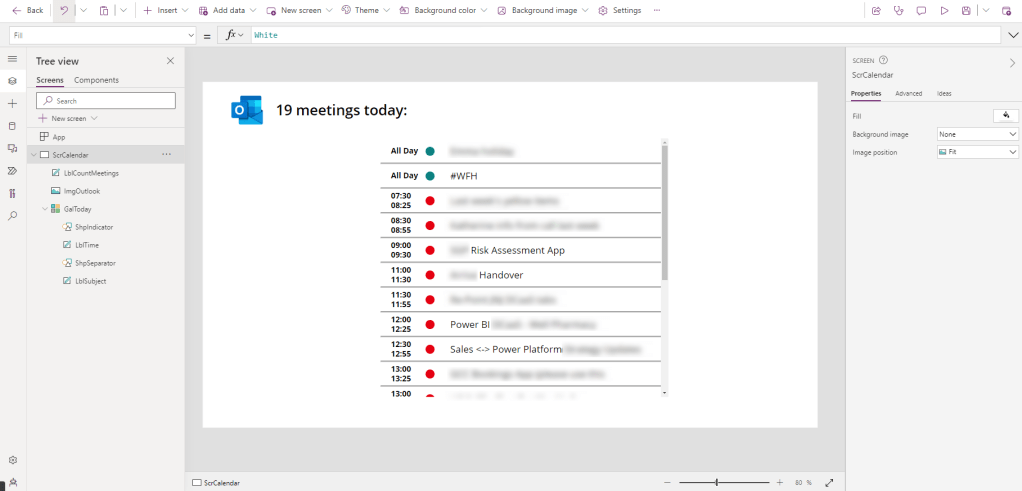
And there we have it! In this example we have just explored building a calendar, but think about the important information you evaluate to prioritise, and you could further expand upon this to include Planner, To Do, and many more pieces of data!
Bonus Points
I had a request from someone within the community to help them write some Power Fx code to show the logged in user’s calendar instead of your own, which is a great scenario and would expand the capability of your application significantly – going from being a personal productivity hub to a dashboard that others can also use.
My good friend & colleague Emilie makes this look easy, by setting the logged in user’s Calendar ID as a Variable which then replaces my code placeholder with the newly initialised Variable.
To do this, you simply need to add the Set function to your code above the existing ClearCollect statement for your calendar with the following code. This is what your OnStart Property should look like once you’re finished:
Set(
    calID,
    LookUp(
        Office365Outlook.CalendarGetTablesV2().value,
        name = "Calendar"
    ).id
);

ClearCollect(
    MyMeetings,
    SortByColumns(
        ShowColumns(
            Office365Outlook.GetEventsCalendarViewV3(
                calID,
                Text(
                    DateTimeValue(Today()),
                    DateTimeFormat.LongDateTime
                ),
                Text(
                    DateTimeValue(
                        DateAdd(
                            Today(),
                            1350,
                            TimeUnit.Minutes
                        )
                    ),
                    DateTimeFormat.LongDateTime
                )
            ).value,
            "start",
            "end",
            "showAs",
            "isAllDay",
            "subject"
        ),
        "start",
        SortOrder.Ascending
    )
);