It’s been a busy couple of weeks over in my world, with 4 days of work visits to Stroud, Bristol, and Hungerford in five working days! This was an exceptionally busy time which only happens once a year or so, but I’m always conscious of Teams pinging in the background with notifications in Channels.
On LinkedIn I recently shared that I’m using Power Automate cloud flows to send a summary of my incomplete Microsoft To Do items every morning at 9am, where some of the lists include Teams Notifications that I haven’t yet addressed. Sending the email is the easy bit, and whilst the Teams Notifications element in Microsoft To Do took a little bit longer, once I’d identified a repeatable sequence then I was able to repeat this for every Team and Channel I wanted to.
Why move Microsoft Teams Notifications into Microsoft To Do?
At my current place of work we simply don’t use email except for the occasional external communication. Admittedly I found this quite difficult to get used to, but now I feel like I’m context switching a lot less than previously using the following products:
- Microsoft Teams for day-to-day comms with my colleagues on projects.
- Viva Engage (typically from within Teams) to share the inevitable snaps of pets jumping on keyboards.
- Microsoft To Do to bring together flagged Outlook emails, Planner tasks assigned to me from other people’s boards, and finally Microsoft Teams notifications.
I now only need to use two app windows to access all of my most important activity and both windows are split nicely into my task list and my communications!
The Solution
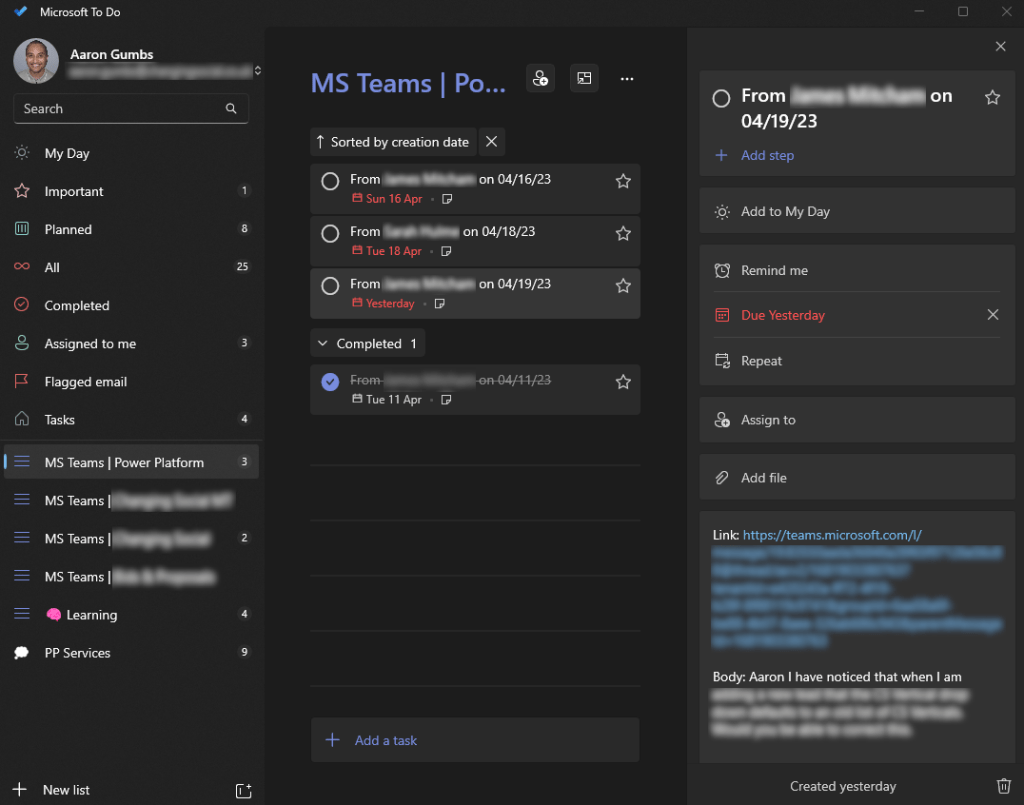
The aim is to have every Teams message that mentions me personally pushed into a Microsoft To Do list, with the content of the message, a due date, and a URL to the Teams message itself. This way I can read the content, consume and reply, and then consciously check it off my list given that the importance of these messages are particularly high.
When I first started building this I didn’t expect it to take as long as it did. I had incorrectly assumed that I’d be able to write a cloud flow that takes any @mention from any Team and then I’d be able to populate some basic details using friendly labels as opposed to IDs. I was so wrong for a couple of reasons!
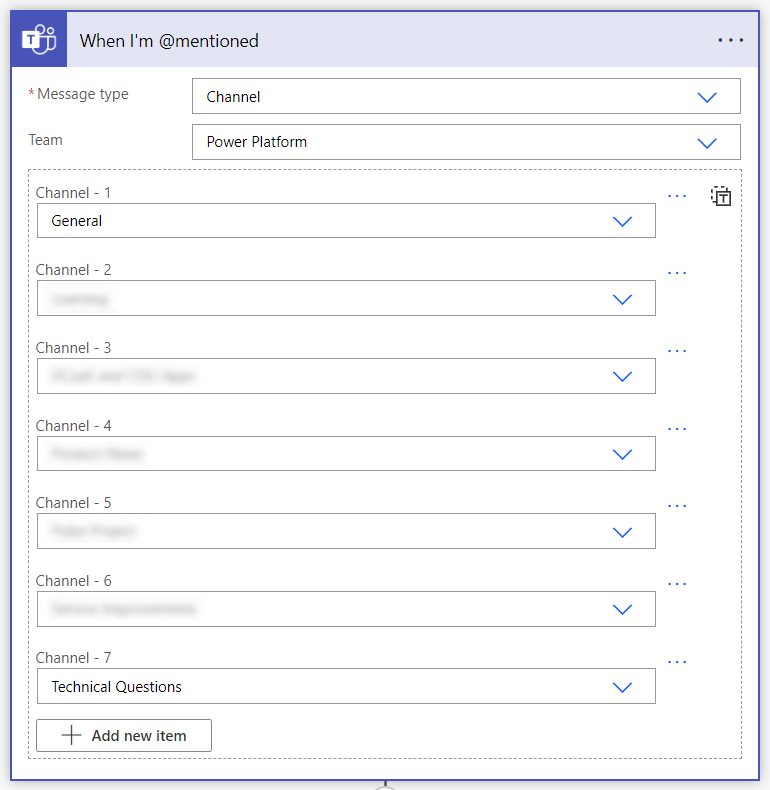
Configure the ‘When I’m @mentioned’ Trigger
To start off you have to choose a specific Team for your trigger and the associated Channels. This was my first incorrect assumption and it means that I have to configure a cloud flow per Team for this particular solution.
This isn’t a bad thing though, as it made me think about what notifications are really important to me as opposed to those where I can consume them at my own pace. It turns out that in over 40 Teams and 100+ Channels I only actually wanted information from 4 Teams as they were the most significant for my Power Platform practice and my management duties.
Get the Current Time and add an Apply to Each
Once we have configured the Trigger, we need to consider how the data is received by the flow. The trigger works based upon a polling frequency of every few minutes, and this means that multiple @mentions may be received by the cloud flow at once. By adding an ‘Apply to each’ step we can run each action within our process for each @mention received as long as we set the output to the ‘value’ from the Trigger.

Get Message Details and Add a To Do Item
When the trigger returns values, it only returns a small amount of information including the Message ID as opposed to the actual Message that was sent by the sender.
In order to ensure that the content of our To Do item makes sense, we need to add the ‘Get message details’ action from the Teams Connector inside our ‘Apply to each’.
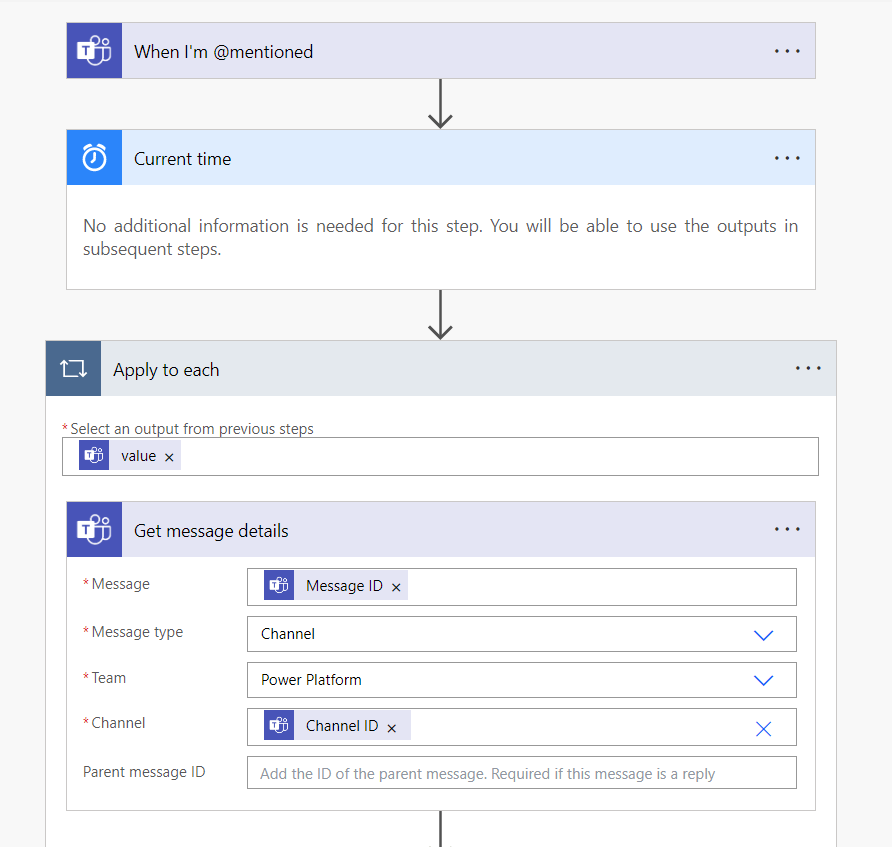
By using the Message ID and the Channel ID from the current Item, we can obtain more meaningful data from the Message itself.
Next we need to use the ‘Add a to-do (V3)’ action in order to create the Microsoft To Do item. This is relatively straight forward as the Dynamic Values from the ‘Get message details’ action are very friendly.

In this case I have chosen to format the time so that my To Do Item’s title appears as, for example, “From Aaron Gumbs on 21/04/23”. In addition, I have set the Due Date to the current time as this gives me a sense of prioritisation in Microsoft To Do, and in the Body I post a link to the Teams message alongside the message itself in case I can conciously complete the item without needing to reply to anyone.
And there you have it! You might want to vary the contents within but this should get you started on the way to filtering the most important @mentions to you on any given day, and you can simply make a copy of the flow for each relevant Team and adjust the Dynamic Values within.
References
Microsoft Teams – Connectors | Microsoft Learn
Date time actions reference – Power Automate | Microsoft Learn
